Recently a customer contacted STB support with a problem.
He was testing SATA drives and wanted to look at the SMART data and self-test logs.
But every time he’d select certain drives he would see this error:
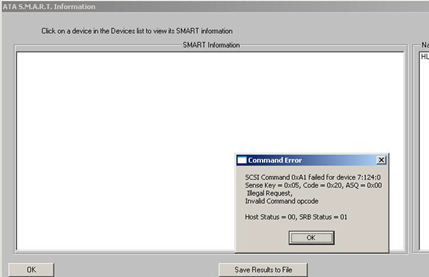
The SMART Feature Set – enabled or disabled?
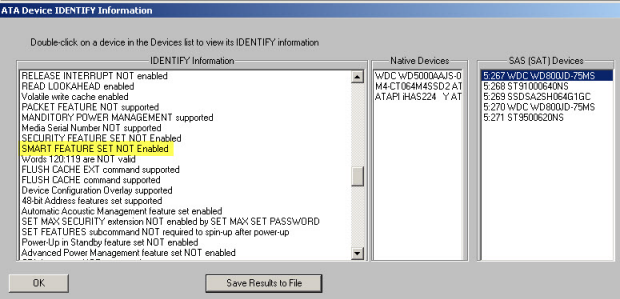
The command to retrieve the drives SMART data was failing. A quick look at the drives IDENTIFY information showed that while the SMART Feature Set was supported by this drive, it was not enabled –
Enabling the SMART Feature Set – STB Suite Original Mode
It is a simple matter of sending the properly formatted SAT embedded command to the drive to enable the SMART Feature Set – or any other Feature Set.
Simply right-click on the drive to bring up the Quick Commands menu and choose User Defined CDB’s.
Define the CDB exactly as shown here –
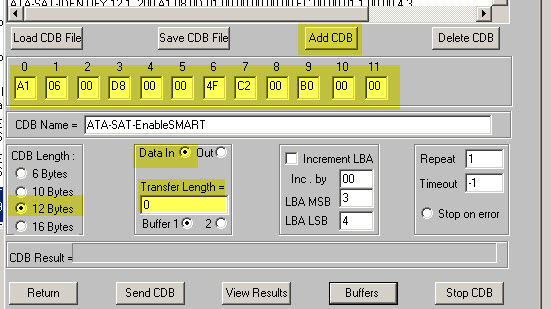
In case you may want to be able to easily issue this command later on it is an easy thing to save it to your CDB Definition file. First click the Add CDB button to add the command into the list, then click Save CDB File to permanently save it. You can save the file to the default CDB definition file which is named Commands.dat.
Now click the Send CDB button – this will issue the command to your drive. You should see ![]()
Recheck IDENTIFY information to confirm
Use the ATA/SATA->Commands->View IDENTIFY Information function to confirm that the SMART FEATURE set is now ENABLED –

Disabling the SMART Feature Set – STB Suite Original Mode
If for some reason you’d like to disable the SMART Feature Set you use the same process as before but with a different CDB – this one-

Enabling or Disabling Feature Sets under DMM
If you need to enable or disable any Feature Set on many drives you will want to use DMM. STB provides a DMM-Add-On application which allows this – contact sales@scsitoolbox.com to request DMMSetFeatures.zip
DMMSetFeatures Instructions
The way to use this program is:
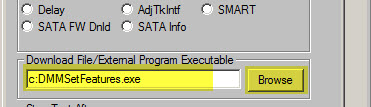
- Unzip the .exe and copy it to the root (\) folder of the C: drive on your test machine. In other words, copy it to “c:\DMMSetFeatures.exe”
- In your DMM test sequence call this program using the “External Program” test step.
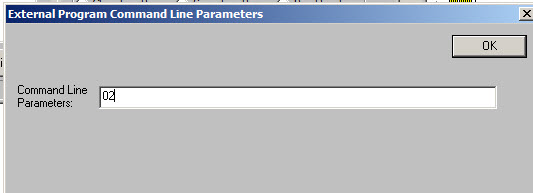
- When you click on “External Program” button it will pop up a screen asking you for “Command Line Parameters” – enter the SATA Feature code that you want to send to the drive. For example, we’ll send Feature code 0x02 to enable write cache. Here’s what you should see:
- Once you click OK above then use the Browse button next to the “Download/External Program Executable” field to point to the test program .exe file – like this:
- Now click the “Add this test to test sequence” button to add this test into the sequence.
- When you click on “External Program” button it will pop up a screen asking you for “Command Line Parameters” – enter the SATA Feature code that you want to send to the drive. For example, we’ll send Feature code 0x02 to enable write cache. Here’s what you should see:
Select your drive(s), click Start, and the test will run. When the test sequence gets to the new program step it will pop up a console window which will go away in a few seconds as the command gets issued.
You will see the results in your DMM .log files.
Also, you can change or set features which include a “count”. The way this works is you specify first the FEATURE you want set, and then a comma and the COUNT value if there is one.
For example – turning write cache on is SET FEATURE 2 – and it doesn’t have a COUNT – so in DMM when you specify the external program and it pops up the command line parameters window you’d enter “2,0” (WRITE CACHE, 0 count). If you wanted to turn write cache off you’d enter “82,0”, etc.
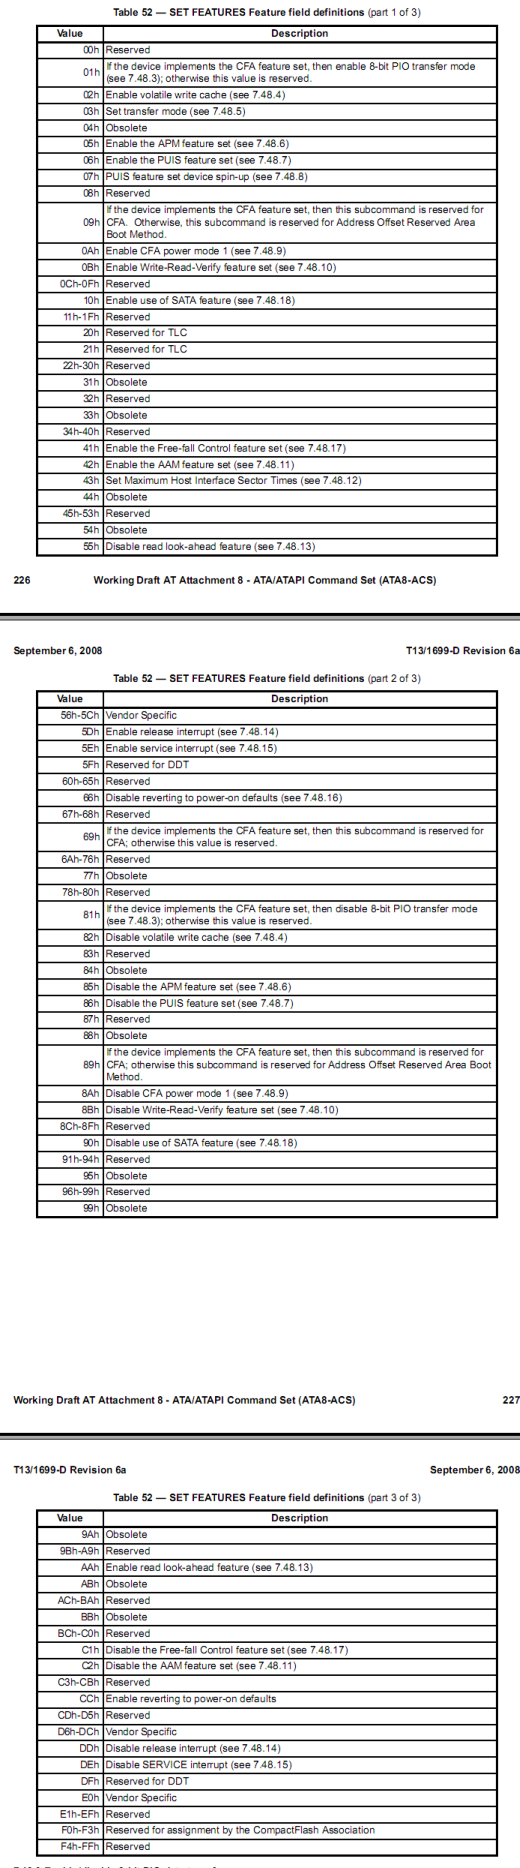
Here’s a list of all the FEATURES – you can set any of them, and the program will show in the DMM log files what you did.
For an example of a FEATURE that has a COUNT field have a look at the Advanced Acoustic Management FEATURE:
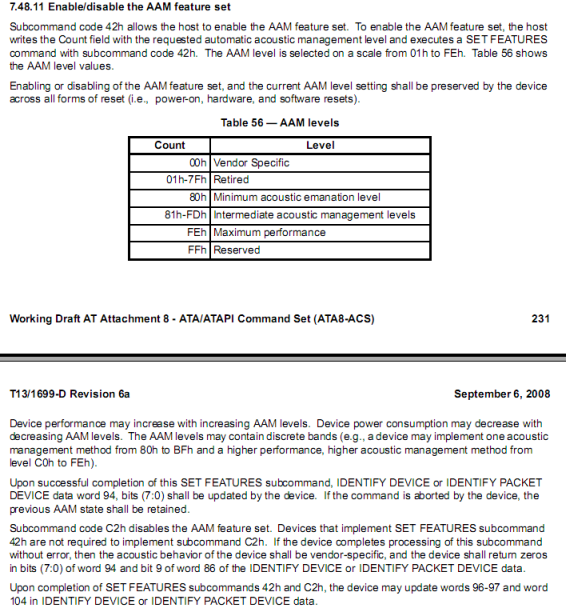
So – to turn AAM on with maximum performance setting you’d enter “42,FE”